When Kate of Sewing from Scratch began talking about having a blog tour, I immediately jumped on board. I enjoy blog tours, they motivate me to be semi productive, and there is usually some sort of giveaway involved. Keep reading for that part!
So we decided to focus our tour on the Halla Agnes top/dress. Our plan was that we all use the same pattern, but make it our own and write a blog post about it. If you join Halla’s Facebook group, you can get a code making The Halla Agnes is a free pattern for you. So first off, if you are a regular reader of my blog, you know I don’t typically sew anything from Halla. I fall just outside of their size chart on the bust and waist measurements. As a rule for myself, I don’t sew a designer who isn’t inclusive in my size. That being said, sometimes I like to try new things.

As part of my hack, I am going to speed walk you through a full bust adjustment and adding some extra room to the waist measurement. Additionally, I will be teaching you how to make a floaty sleeve and scooping out the neckline. Just to throw a little extra fun in the mix, I also did a rolled hem to finish my edges which was new to me! I didn’t realize how much I was doing to this pattern until I am sitting here writing my post. I promise, even with all these adjustments it is a fairly quick sew. Buckle up, Here we go! I want to start by saying, I didn’t full bust or belly adjust anything for cutting the back half of my pattern. So I cut it out first before making these changes.
First – Print and tape your pattern as usual. I have printed the largest size which is 30. I knew I would need to do a FBA or Full bust adjustment before doing any sort of hacking. I have taken a few photos to show you the process as well. I started by cutting this pattern horizontally at the line indicating the waist. This allowed me to work with just the upper portion which is what I wanted to adjust. I then used the slice and spread method to open up the bust portion and add a bit of extra room where I needed it. This first picture is my pattern cut at the waist line and the second is after my slash and spread.


Now that I have created a little extra room at the bust, I taped my top and bottom pattern pieces back together keeping the fold line even. You can see in the photo that the upper portion is kicked out about 1.5 inches from my FBA. I inserted scrap paper to fill in at the waist. I then graded from my new upper edge to the original hemline. This will give me a total of about 3 inches in the front of my dress. This will give me extra room for my belly. 
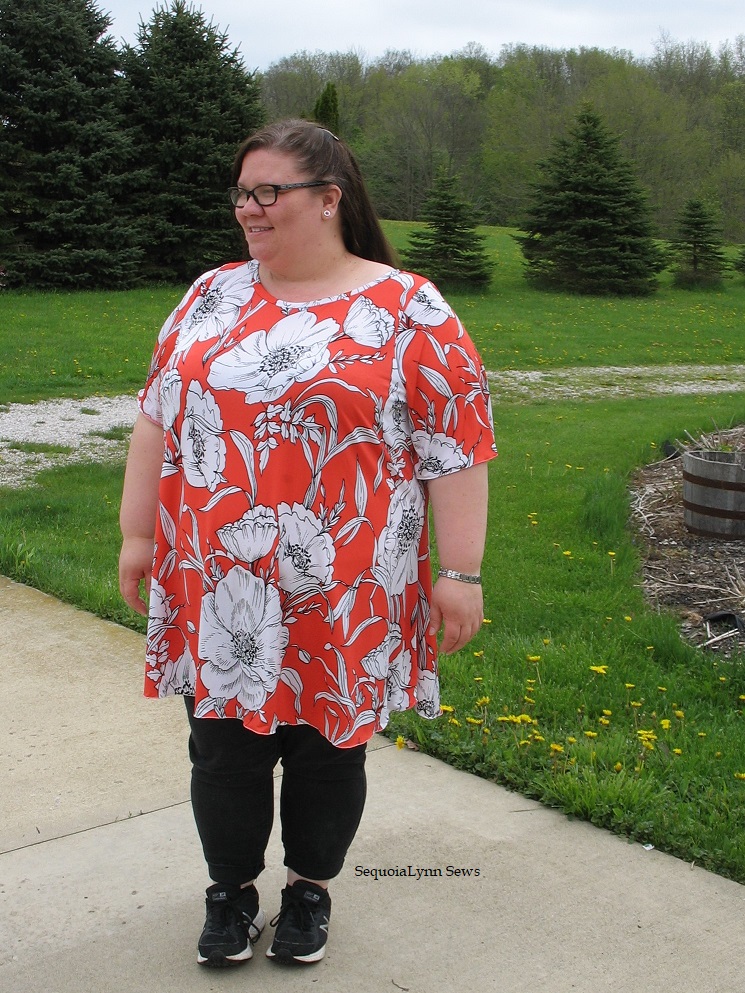
I also knew I wanted a length between the two included hem options. So I measured 2 inches down from the top hem and followed the curve when trimming the paper. I wanted to wear my top as a tunic over leggings or as a cover up when pool side so this length is perfect.

Finally, I curved out my neckline a bit by cutting out a J shape from the pattern. I always err on the side of caution so my neck line doesn’t become huge. You can sliver trim to go wider, but once you cut fabric, you can’t put it back. Sorry no pic!
Let’s adjust our sleeves now! I almost always have to adjust the bicep of patterns, but by making this floaty sleeve I won’t be using my typical method! This sleeve includes is a “cut on the fold” pattern meaning you really only see one half of each sleeve. I flipped my pattern over and traced the second half of the sleeve on blank paper. Then tape it together so you have an entire sleeve pattern. Next, I used my rotary to cut some slashed to spread my pattern out. I used scraps of paper to fill in the gaps and now my sleeve pattern looks like this. Looking back, I wouldn’t have be upset if I had opened this up even more!!

Now follow the pattern assembly directions and it is business as usual! I remeasured and cut my neckband at 85% to fit my wider scoop.

I picked up this fun floral print from Rosa at Sew Blessed. I love it and it is so perfect for summer!

I used the rolled hem on my sewing machine to finish all the edges because this ITY is super slick and I felt like it would be a nightmare to hem neatly! Rolled hemming went insanely quick! I plan to use it a lot more for fabrics like this.
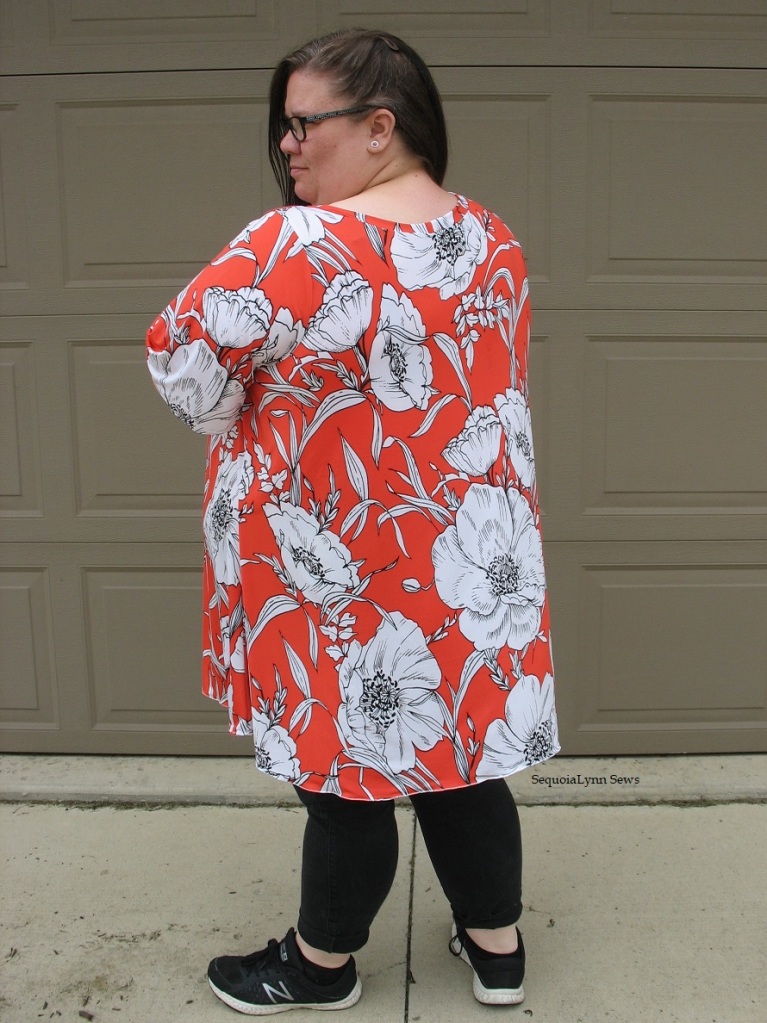
I think I could even belt this and wear it as a short dress! I sure do love options!!
Thanks for stopping by! Once you’ve entered my drawing, be sure to find the others on the tour for even more chances to win! We’re EACH giving away 1 Halla Pattern code. That means 5 chances to win!! All draws will be made on Saturday, May 11, 2019 so you have time each day to read, enjoy + enter each sewist’s contest.
Monday – Kate from Sewing from Scratch adding a V-Back to the Agnes Dress (for an additional entry, visit her YouTube video, too!)
Tuesday – Gwen from Crafty Curly Couture making the Agnes Tank
Wednesday – Sequoia from SequoiaLynn Sews demonstrating an FBA, floaty sleeves and a scoop neck.
Thursday – Laura from Custom Made by Laura colour blocking the Agnes Tank
Friday – Stephanie from Sarcastic Sewist adding a quilted yoke and slim dress line to the Agnes Shirt.

Are you following me on other social media? Here are my links.


I love your dress! You did a great job explaining all of your pattern adjustments and changes you made! Thanks for sharing! ❤
LikeLike
It looks great on you!
LikeLike
Great job
LikeLike
Love this! Agnes is one of my favorites! I will definitely do the sleeves hack….
LikeLike
Thanks for stopping by and I can’t wait to see your sleeves!
LikeLike
The Agnes is one of my favourites, I love the fabric that you used – that colour is just gorgeous.
LikeLike
Looks great! So glad you shared I rarely sew for myself because I can’t get it to fit right but I’ve never tried an FBA or other adjustments.
LikeLike
Great job!
LikeLike
Love this!! I found you through the current blog hop and so excited! I am also a plus size woman!
LikeLike
Hi Brenda thanks for coming by!!
LikeLike
Your top looks great on you! I love all the customized fits you did, the FBA, the sleeve adjustment and the neckline. Now I need a French Curve Ruler. Thank you so much for the photos and great explanation on how to make a better fit on the Agnes!
LikeLike
This is awesome..i luv ur fba directions
LikeLike